
Toyota cooling fan noise can describe several different complaints: strong airflow, a light rattle, repeated scraping, a bearing-like growl or vibration through the front of the vehicle. These observations do not all call for the same repair, and a loud fan is not automatically a failed motor.
Before replacing the assembly: confirm which fan is making the noise, look for blade or shroud contact, inspect the supports and have the motor and control system assessed when necessary. Visible blade damage, striking parts or pronounced wobble calls for prompt professional attention, not another test drive to see whether it improves.
This guide focuses on electric radiator-fan assemblies. Toyota cooling layouts vary by engine, production date and equipment. Engine-driven fans with a viscous coupling need their own procedures; this is not a repair guide for hybrid battery fans or high-voltage systems.
First Separate Airflow Noise From Mechanical Noise
A fan moving a large volume of air can be clearly audible. Scraping, irregular clicking and a newly developed vibration are different observations. Record when the sound starts, whether it changes as the fan changes speed, and whether it was present before recent cooling-system or front-end work.
Valeo’s motor-fan guidance identifies a broken support or damaged fan as possible sources of noise and vibration. The support and the wheel therefore deserve attention alongside the motor.
Do not judge the condition from volume alone or compare two different Toyota vehicles as if their fan systems were identical. A phone recording can document the event, but it does not establish an acceptable noise limit or identify an internal bearing fault.
Toyota Cooling Fan Noise: Quick Inspection Table
| Observation | Inspection priority | Do not assume |
|---|---|---|
| Repeated scraping or clicking while the fan turns | Debris, matching contact marks and blade condition | That cutting the shroud or trimming a blade is a repair |
| Shroud or radiator area visibly vibrates | Mounting features, supports, retention and nearby touching parts | That the motor alone is responsible |
| Growling, squealing or rough mechanical noise | Motor condition and the rotating assembly after safe isolation | That sound alone proves bearing failure |
| Noise began after radiator or fan replacement | Correct component, seating, harness routing and attachment points | That a similar-looking replacement is compatible |
| Noise appears mainly when A/C is requested | Identify the source and compare fan demand with actual operation | That the A/C compressor or fan must be faulty |
| Noise follows the cabin blower setting | Distinguish the HVAC blower from the front cooling-module fan | That every fan sound comes from the radiator area |
| Blade damage, striking parts or severe wobble | Stop using the damaged assembly and arrange professional assessment | That continued operation is safe because the temperature gauge looks normal |
1. Identify the Source Before Dismantling Anything
Start with location and operating conditions. Does the noise come from the front cooling-module area, the dashboard vents, or another part of the vehicle? On a hybrid, also distinguish a battery-cooling fan complaint from an engine-radiator fan complaint. These systems are not interchangeable.
Note whether the sound appears with A/C operation, during cooling demand or only over bumps. Correlation is useful, but not conclusive: an A/C request can coincide with changes in several components. Avoid replacing a compressor or fan solely because the sound appeared when the A/C was switched on.
Keep any observation at a safe distance. Toyota’s owner-manual precautions describe automatic electric-fan activation under specified conditions. Before physical inspection, follow the correct shutdown and isolation procedure for the actual vehicle.
On a hybrid, an engine that is currently silent does not establish that the vehicle is safely shut down. Do not work in a READY vehicle or touch high-voltage components. A technician should establish the appropriate safe state before inspecting the cooling assembly.
2. Inspect Debris, Blade Roots and Contact Evidence
With the assembly safely isolated and accessible, inspect the wheel and surrounding opening. Look for leaves or foreign material, polished scrape marks, plastic dust, chipped blade tips and cracks near blade roots. Preserve photographs of the evidence before cleaning it away.
Check the complete accessible wheel rather than only the first blade in view. If marks appear on both a tip and the shroud, record their positions. The next question is why the two parts came into contact: a displaced surround, damaged wheel, incorrect component or another support issue may need investigation.
HELLA’s radiator-fan overview treats unusual mechanical noise and visible wheel or assembly damage as reasons for inspection. Do not turn these general clues into a claim that one particular Toyota component has failed.
Do not remove debris through a running fan, reach past rotating blades or use a tool to stop the wheel. Do not glue cracked blades, cut off a damaged section or add improvised balance weights. A fan that has struck another part needs assessment even after the obstruction is removed.

3. Check the Shroud and Its Mounting Arrangement
The rotating wheel and stationary shroud need to retain their intended relationship. Inspect the frame, locating features, mounting tabs, fasteners and the supports around the radiator. Where the design uses rubber supports, confirm their condition and correct seating rather than assuming all movement is a fault.
Look for a frame pulled out of position, a cracked attachment point, missing retention hardware or a nearby hose or harness touching the assembly. A radiator replacement or front-end repair can make installation history especially relevant, but it does not prove that previous work caused the complaint.
Compare the installed arrangement with the vehicle-specific parts and service information. There is no universal Toyota fan-to-shroud clearance or mounting torque in this guide. Do not use extra washers, zip ties or altered mounting holes to make a mismatched assembly appear to fit.

4. Assess Motor Condition Without Guessing From Sound
A growl or squeal can point the inspection toward the motor, but the complete rotating assembly still needs consideration. After safe isolation, a technician can check for abnormal movement, roughness and other evidence using the procedure applicable to the fitted motor.
MAHLE’s electric radiator-fan guidance includes bearing damage, wheel breakage and electrical faults among possible failure causes. These are distinct possibilities, not a parts-replacement sequence.
Do not use an improvised free-spin duration or a comparison with an unrelated motor as a pass/fail specification. This article provides no universal bearing-play allowance or motor-current value. Sealed motor construction also should not be treated as an invitation to spray lubricant into the housing.
If a wheel or motor is replaced separately, verify that the repair is permitted and that the correct matched parts are available. A motor that can physically bolt into a shroud is not necessarily the correct electrical or mechanical replacement.
5. Compare Controlled Fan Operation With the Complaint
When static inspection does not explain the problem, a workshop may need a controlled operational assessment. The useful comparison is whether the noise occurs during a verified fan command, changes with the commanded operating state, or belongs to another component.
A Toyota-authored cooling-fan diagnostic procedure reproduced in Operation CHARM uses an active test on its specified application. This illustrates an evidence-led approach; it does not establish one scan-tool menu or control strategy for the entire brand.
Use the appropriate diagnostic equipment and keep people, loose leads and tools clear of the operating fan. Do not run an assembly with visibly damaged blades simply to obtain another recording. Do not test a loose powered assembly on a workbench.
If operation is intermittent or does not match the verified command, investigate the supply, grounds, connectors and control circuit using the correct wiring information. A heat-damaged connector requires investigation of the underlying cause, not merely a new plug or an assumed motor diagnosis.

6. Decide What Actually Needs Replacement
The inspection should end with a supported repair decision. A confirmed damaged wheel, motor fault or broken frame may justify replacing the relevant serviceable part or the complete assembly. A debris or installation issue may require a different correction, followed by assessment of any resulting damage.
Record both the cause and the damage found. Replacing a fan without correcting displaced supports can leave the interference unresolved; replacing only a support may leave a wheel that was damaged by the original contact.
After the repair, restore the intended routing, guards, connectors and retention hardware. Complete the required controlled checks, including appropriate fan operation and confirmation that the original noise or vibration is no longer present. A quieter sound alone is not a substitute for checking the completed installation.
Choosing the Correct Replacement Toyota Fan
Once replacement is justified, confirm the complete OE reference and any valid supersession, along with engine, production date, market and cooling equipment. Compare the supplied assembly’s connector, control arrangement, wheel configuration, shroud outline and mounting interfaces.
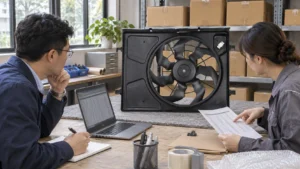
Blade count, fan count and motor arrangement vary across applications. The dual-fan assembly in the illustrations is an example, not a specification for every Toyota. Avoid approving fitment from the brand badge, a similar photograph or the number of fans alone.

Browse our radiator fan category and cooling fan motor category after diagnosis. Send the original reference, vehicle details and clear photographs for a fitment review. Product selection support does not replace workshop investigation of the noise.
Frequently Asked Questions
Does Toyota cooling fan noise always mean the motor is failing?
No. First distinguish airflow from mechanical noise and inspect debris, wheel condition, supports and contact evidence before deciding what to replace.
Why does the noise appear when the A/C is on?
The A/C request can coincide with changes in cooling-system operation. Identify the sound source and actual fan behavior rather than assuming that either the compressor or fan is defective.
Can a loose shroud cause vibration?
A damaged or incorrectly retained support can contribute to noise or vibration. Confirm the complete mounting arrangement and inspect for resulting wheel contact.
Can I drive with a cracked cooling-fan blade?
Do not keep operating a visibly damaged or striking fan to see whether it improves. Arrange professional assessment, particularly if there is severe wobble, an overheating warning or damaged wiring.
Do all Toyota vehicles use the same fan assembly?
No. Verify the original reference, vehicle application, cooling specification and physical and electrical interfaces before ordering.
Image note: These AI-generated workshop scenes use real Toyota engine-bay and fan-assembly photographs as structural references. They illustrate inspection tasks, not actual test results, brand-wide installation diagrams, clearance measurements or package contents.