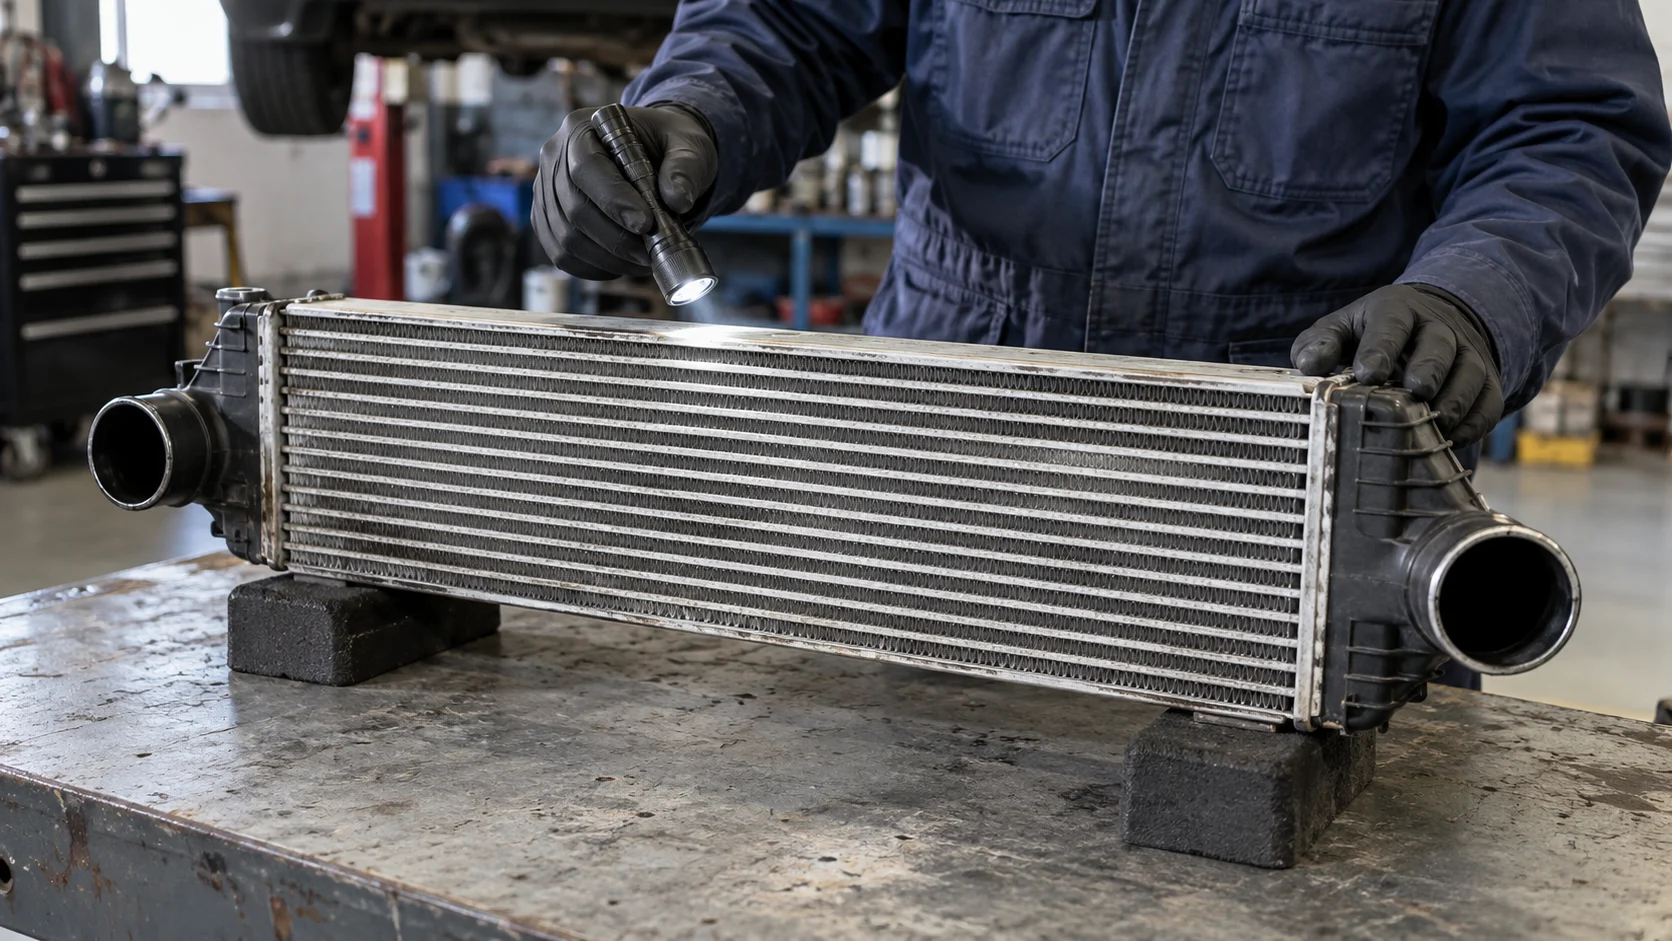
Intercooler leak symptoms often appear as reduced power, a hiss under acceleration, or an underboost fault. These symptoms tell you to inspect the charge-air system; they do not identify the intercooler as the failed component. A split boost hose, damaged connector seal, loose coupling, or boost-control problem can produce a similar complaint.
This guide explains how to inspect the core, end tanks and boost hoses, what an intercooler pressure test can establish, and when replacement is justified. It focuses on air-to-air intercoolers used on turbocharged vehicles, with practical checks for workshops and parts buyers.
Where Is the Intercooler, and What Does It Do?
An intercooler removes heat from compressed intake air between the turbocharger compressor and the engine intake. On an air-to-air design, the charge air passes through internal passages while outside air flows across the fins.
That describes its position in the air circuit, not a universal mounting location. Depending on the vehicle, the cooler may be front-mounted, side-mounted or above the engine. Some engines use a liquid-cooled charge-air cooler instead; its coolant circuit requires different checks. Trace the large charge-air pipes and consult the vehicle’s service information before identifying the component.
A front heat exchanger is not automatically an intercooler. The engine radiator carries coolant and the A/C condenser carries refrigerant. Our radiator and condenser identification guide explains those separate components.
Common Intercooler Leak Symptoms
Complaints are often most noticeable when the engine requests boost. The vehicle may accelerate poorly, enter a reduced-power mode, or make an unfamiliar rushing or hissing sound. Some applications show an underboost code such as P0299. Fuel consumption or exhaust smoke may change, but these are not universal symptoms and have other possible causes.
A leak can also be too small to hear at idle. Equally, a noise under acceleration can come from another intake or exhaust connection. Record when the fault occurs and compare requested and actual boost using the manufacturer’s diagnostic procedure.
| Finding | Possible source | Useful confirmation |
|---|---|---|
| Hiss and weak acceleration | Hose, coupling, cooler or another air-path leak | Locate the escape point using the approved leak-test procedure |
| Oil and dust around a connector | Joint seepage, residual oil or oil from a nearby source | Inspect the seal and retention, trace the oil source and test the joint |
| Leak confirmed at an end-tank seam | Tank, gasketed joint or header damage | Check the complete seam and adjacent mounts; assess cooler replacement |
| Stone impact or rubbing on the core | Damaged fins or a punctured charge-air tube | Distinguish surface fin damage from a tested pressure-boundary leak |
| Dirty fins and poor cooling performance | Restricted external airflow or another thermal fault | Inspect ducts, fins and operating data; do not assume a boost leak |
| Underboost code without a located leak | Charge-air leak, boost-control, sensor or other engine fault | Continue system diagnosis before replacing the cooler or turbocharger |
1. Inspect the Boost Hoses and Connections First
With the engine stopped and cool, follow the complete charge-air route. Inspect hose bends, undersides and areas touching brackets. Look for splits, abrasion, damaged reinforcement, distortion and a hose that has moved out of its connection.
Check each coupling’s actual design. A clamped hose needs the correct hose, clamp and seating position. A quick-connect joint may use a retaining clip and internal seal; a missing clip, damaged sealing surface or incorrectly fitted O-ring can leak even when the cooler core is sound. Avoid treating extra clamp force as a universal repair.

Does Oil Around a Hose Prove an Intercooler Leak?
No. Oil mist from crankcase ventilation can leave residue inside the charge-air system on some engines. A local oily dirt pattern can guide inspection, but it does not prove a cracked intercooler or failed turbocharger. Hino’s oil-residue technical tip illustrates why this must be interpreted for the particular engine.
Substantial pooled oil, rising oil consumption or a sudden change in smoke needs further diagnosis. Identify the source and follow the vehicle procedure before running the engine again if significant oil or debris has entered the intake path.
2. Check the End Tanks and Their Joints
Inspect the entire tank-to-core joint, not just the visible front edge. Depending on the design, the cooler may use crimped plastic tanks or welded metal tanks. Look for a cracked intercooler end tank, a distorted joint, damaged port neck or contact marks where the assembly has moved against surrounding parts.
Check mounting tabs, rubber supports and pipe alignment at the same time. A strained hose or damaged support can load a tank connection. A new cooler installed under the same strain may develop another fault.

3. Separate Core Damage from Bent or Blocked Fins
The fins help transfer heat; the internal tubes contain the compressed air. Bent fins alone do not establish a pressure leak. A punctured tube, damaged tube-to-header joint or cracked tank is a different finding and must be assessed as part of the pressurized circuit.
Inspect both faces where access allows. Look for stone impacts, corrosion and rubbing from an adjacent condenser, bracket or pipe. Leaves, mud and badly crushed fins can reduce heat transfer without allowing charge air to escape. Follow the component’s cleaning instructions; aggressive pressure washing or hard tools can cause additional damage.

4. Confirm the Fault with an Intercooler Pressure Test
A charge air cooler leak test helps distinguish a suspected fault from an actual escape point. The correct setup depends on whether the cooler is tested separately or as part of the installed air path. Professional testing should follow the vehicle and equipment instructions.
- Identify the test boundaries. Confirm which hoses, valves and branches are included, and isolate the system as specified. An unintended open path can make the result misleading.
- Use suitable test equipment. Use rated, securely retained adapters, a regulator and the required pressure-relief arrangements. Keep clear of plugs and caps under pressure.
- Apply the specified test conditions. Use the prescribed pressure, test duration and allowable pressure drop. There is no single PSI value suitable for every intercooler.
- Locate and verify the leak. Check test-tool connections as well as vehicle joints. Approved leak-detection fluid or compatible smoke equipment can help when permitted by the procedure.
- Release pressure before disconnection. Repair the confirmed fault, then repeat the appropriate test and operating checks.
A pressure drop alone does not locate the fault, and some procedures allow a defined amount of decay. A low-pressure smoke test can also miss a fault that opens only under different load or temperature conditions. Follow the specified diagnostic sequence rather than treating one negative check as conclusive.
For an example of application-specific test criteria, see the Navistar charge-air-cooler test bulletin. Its limits apply to the stated applications and should not be copied to another vehicle.
When Does the Intercooler Need Replacement?
Replacement is generally appropriate when testing confirms a leak from a damaged core tube, tank or joint and there is no approved service repair. Broken mounting features, severe deformation or contamination that cannot be safely removed can also make the assembly unsuitable for reuse. A damaged hose or replaceable seal does not, by itself, require replacing the entire cooler.
Identify why the cooler failed. Excess boost, impact damage, poor mounting, rubbing or contamination must be addressed to reduce repeat failure. Do not assume a new component will correct a control-system fault.
What If the Turbocharger Has Failed?
A damaged compressor wheel can send fragments into the charge-air path. MAHLE explains that debris can lodge in internal intercooler structures and may not be removable by cleaning. Its technical guidance on charge-air cooler contamination supports checking the entire route and replacing a cooler that cannot be thoroughly cleaned. Do not apply that debris-contamination scenario to every light oil stain.
Intercooler Replacement: Fitment Checks Before Ordering
Once the failed component is confirmed, match the replacement to the vehicle and removed part. Similar-looking coolers can differ in connection style, thickness or mounting geometry. Send the supplier:
- The OE reference, vehicle model, production year and engine code.
- Clear photographs of both faces, port connections and mounting points.
- Core and overall dimensions, including thickness and port orientation.
- Details of quick-connect fittings, hose connections, sensor openings and brackets.
- The required supplied content, including seals, clips or supports where applicable.

After installation, restore the air guides and supports, confirm hose retention and check for contact with nearby components. Complete the specified leak and functional tests. Compare relevant operating data and check for returning faults under the approved test conditions.
Frequently Asked Questions
Is an intercooler leak the same as a boost leak?
An intercooler leak is one possible source of a boost leak. Hoses, couplings, seals and other components in the pressurized intake route may also leak. The important distinction is the confirmed location.
Can a leaking intercooler trigger P0299?
It can contribute to an underboost condition, but the code does not prove the cooler is faulty. Check the air path, sensors and boost-control system according to the vehicle’s diagnostic procedure.
Can an intercooler leak without visible damage?
Yes. Small joint leaks and cracks may be difficult to see, and some faults depend on pressure or temperature. A visual inspection should be followed by the appropriate test when symptoms remain unexplained.
Can I keep driving with intercooler leak symptoms?
The answer depends on the severity and cause. Avoid demanding boost while the fault is unresolved. Sudden major power loss, a detached hose, heavy smoke, significant oil in the intake or suspected turbocharger damage warrants stopping and arranging professional diagnosis.
Will replacing the intercooler fix every low-boost complaint?
No. Replacement helps when the cooler is the confirmed fault. A leaking hose, damaged seal, faulty actuator or incorrect sensor signal requires its own repair.
Find the Correct Intercooler Assembly
Browse Yongshang Auto’s intercooler assembly category after identifying the failed component. For a fitment enquiry, provide the OE number, engine and vehicle details, original-part photographs, quantity and destination. This lets the supply configuration be checked before quotation.
Images are AI-generated workshop illustrations, not photographs of a specific vehicle repair or product SKU. Component layouts and test procedures vary by application.
Further technical references: Nissens intercooler failure guidance; BorgWarner turbo-system troubleshooting. Always use the exact vehicle’s repair information for test values and service procedures.